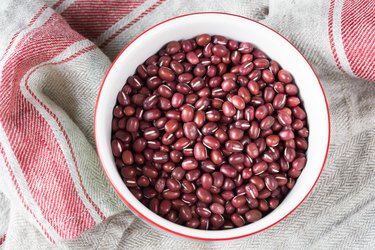
Adzuki beans, also called aduki or azuki beans, are small, red, dry beans often used in Japanese and Chinese dishes. Their small size lets them cook more quickly than other beans, and they have a reputation for not causing quite as much of a gas problem as other beans.
Once cooked, eat the beans plain; mixed with sticky rice to form a Japanese dish called "osekihan;" or ground up with sugar to form red-bean paste. According to the 2015-2020 Dietary Guidelines for Americans, adzuki beans are a good source of potassium with 612 milligrams per 1/2 cup serving.
Video of the Day
Video of the Day
In addition to high potassium, adzuki beans are known for being a high fiber carbohydrate and plant-based protein source. According to the USDA, 1/2 cup of adzuki beans also provides the following:
- 147 calories
- 8.7 grams of protein
- 0.1 grams of fat
- 28.5 grams of carbohydrate
- 8.4 grams of fiber
Read more: Red Kidney Beans Health Risk
Step 1: Sort Adzuki Beans
Sort the dry beans. Throw away any that are moldy, pockmarked, shrunken or broken, as advised by North Dakota State University. Once you finish sorting, repeat the sorting to try to find anything you missed the first time. As you do this more and more, you'll get better at spotting bad beans.
Step 2: Rinse and Strain
Place the dry beans in a strainer. Rinse them off.
Step 3: Soak Your Beans
Place the adzuki beans in a large pot and pour in enough water to cover them well. The beans will expand while soaking, so add enough water for the beans to have a couple of inches of expansion room.
Step 4: Place in Fridge
Place the pot in the refrigerator.
Step 5: Let Beans Sit
Soak the beans at least overnight or for 24 hours if possible. You can also boil the water immediately for a few minutes and then set the beans aside to soak for one to three hours. Choosing to boil the beans for two or three minutes prior to soaking overnight helps to reduce the amount of sugars that cause gas and bloating.
Step 6: Drain and Refill
Drain the beans, and refill the pot with clean water. Again, use enough to cover the beans well, using three parts water to one part beans.
Step 7: Boil and Then Simmer
Boil the water and beans and then lower the heat so that the beans and water simmer.
Step 8: Test Bean Softness
Test how soft the beans are after 45 minutes by cutting one with a fork against the side of the pot. Hold onto the pot to ensure that the pressure from cutting the bean against the side doesn't push the pot off the burner.
Step 9: Drain and Eat
Turn off the heat when the beans are done, drain off the water and add the beans to whatever dish you're preparing.
Consider These Tips
Canned adzuki beans are already cooked and ready to use. You may want to drain the can and rinse off the beans first to get rid of any extra salt. Pressure-cook the beans if you want instead of boiling and simmering them.
Cooked beans freeze quite well. If you find soaking and cooking the beans to be too much of a hassle to do often, make a big batch and freeze small portions. Don't freeze all of the beans in one big container, because they'll freeze in a big mass. You'll never be able to chip off what you need.
Things You'll Need
Strainer
Large pot
Water
Fork
Pressure cooker, optional
- North Dakota State University: "All About Beans Nutrition, Health Benefits, Preparation and Use in Menus"
- USDA FoodData Central: "Beans, Adzuki, Mature Seed, Cooked, Boiled, With Salt"
- Health.gov: "Dietary Guidelines for Americans, 2015-2020: Appendix 10: Food Sources of Potassium"
- University of Nebraska -- Lincoln; Cooking With Dry Beans; Alice Henneman
- Dartmouth: Rice With Adzuki Beans and Jalapenos