

Fitness trends come and go, but a well-rounded core workout will always be in style. Sure, you could plug a couple of core moves into your full-body strength session. However, there are benefits to dedicating some serious time for core workouts on the reg.
"Our bodies are always responding to the signals they receive, so we have to consistently send these signals for our bodies to change," says Kate Galliett, CPT, a certified personal trainer and founder of Fit For Real Life.
Video of the Day
The more you send these mega doses of strength to your core muscles, the quicker your body will get the message to improve, Galliett says. That applies whether you want to build core strength, combat lower back pain or boost your performance in other sports.
Fortunately, this 30-minute core workout, courtesy of Galliett, will help you build the strength you need to meet any goal. Do it two to three days per week if you're after strength gains. Or, if you're hoping to ease lower back pain, aim to do it four to six days per week; just use a lighter weight and band.
Try This 30-Minute Core Workout
This 30-minute core workout is broken up into 4 circuits. For each circuit, do 1 set of each exercise, then repeat each exercise for the prescribed number of rounds. Rest for 30 to 60 seconds at the end of each set, then move onto the next circuit. (But definitely take a brief breather between exercises if you need it!)
For the exercises, you'll need a pair of medium-heavy kettlebells or dumbbells, gliders (paper plates or towels also work) and a long-looped resistance band.
Circuit 1
Do each exercise, then repeat for 2 rounds.
Move 1: Supine 90-90 Hip Lift
- Lie on your back with the soles of both feet resting on the wall. Your knees and hips should form 90-degree angles.
- Place a pillow beneath your head for support and gently squeeze another pillow between your thighs.
- Feel your feet making firm contact with the wall and begin by inhaling through your nose.
- As you exhale through pursed lips, tip your pelvis backward and pull your hips upward by imagining that you’re driving your heels down the wall. But don’t actually move your heels.
- Hold this position as you continue inhaling through your nose and exhaling as slowly as you can through your pursed lips. Your rib cage will drop down and in with each exhale.
Move 2: Pallof Press With Foot Tap
- Attach a resistance band to a sturdy fixture and grip the ends with both hands.
- Hold the band in front of your chest, keeping your elbows soft but not bent. Check that your shoulders are down away from your ears.
- Step away from the anchor point until you feel tension in the band. The tension in the band should be enough to create a sense of resistance against your torso, but not so much that you lose your stance.
- Tuck your pelvis slightly and allow the front of your rib cage to drop into your torso.
- Keeping your weight as centered as you can, lift one foot. Tap it slightly out and behind you, and then immediately bring it back to the starting position.
- Still keeping your weight centered, repeat with the opposite foot.
- Keep alternating sides. Do all reps, then switch sides.
The thinner the band, the less resistance you’ll have to work against. Similarly, standing closer to the anchor point will ease resistance. Adjust one or both of these variables as needed to adjust the difficulty of the exercise.
Circuit 2
Do each exercise, then repeat for 3 rounds.
Move 1: Farmer's Carry
- Stand with your feet hip-width apart and hold a weight in each hand down by your sides, palms facing in. The weights should feel like 5 to 7 out of 10 in terms of intensity.
- Bring your shoulders back and down and brace your abdominal muscles.
- Begin walking with controlled steps. Look forward the whole time. Aim to keep your spine tall as you walk.
- Engage your core to prevent your torso from tilting in either direction.
- Each step is 1 rep. Do all reps, then switch sides.
The farmer's carry exercise is one of the best parts of any core workout, but it also strengthens your back, shoulders and arms.
Move 2: Half Turkish Get-Up
- Lie on your side in a fetal position with your knees and arms tucked up toward your chest. Have a kettlebell next to you, close enough to grab without having to lift it.
- Grip the handle of the kettlebell with both hands and pull it into your armpit as you roll onto your back.
- Bend the knee of the leg that is on the same side as the kettlebell. Your foot should be flat on the ground and your knee pointing skyward.
- Extend the other leg along the floor about thirty degrees away from your body.
- Press the kettlebell over your chest and place the other arm on the floor, parallel with the extended leg.
- Push the arm that is on the floor down firmly and begin to roll your upper torso up toward the extended leg.
- As you roll further upward toward the extended leg, allow your elbow to bend so that your upper arm can leave the ground and your forearm is now the main part of your arm pressing into the floor.
- Roll up until your weight is concentrated on the hip of your extended leg. Keep pressing the kettlebell upward throughout the movement.
- Slowly reverse the motion until you’re back in a lying position.
- Do all reps, then switch sides.
If you struggle to hold a weight overhead throughout the entire exercise, try using your body weight only. Or, practice with a light object like a water bottle or tennis ball until you get the hang of the movement. Once you master this variation, try the full Turkish get-up, which takes you all of the way to standing.
Circuit 3
Do each exercise, then repeat for 3 rounds.
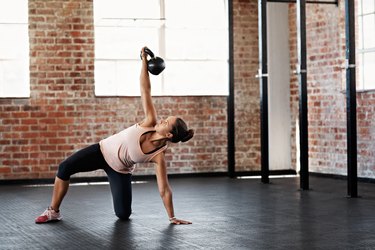
Move 1: Half-Kneeling Kettlebell Windmill
- Take a half-kneeling position and turn your back leg slightly so your foot moves slightly out to the side.
- Pick up a kettlebell with the hand that’s on the same side as the leg that’s in front. Then, pull it into your chest and press it overhead.
- Stiffen your torso and begin to shift your hips to the side as you slowly reach your free hand toward the floor. Your torso will go from an upright position to being tipped over to the side.
- Keep your spine straight and stacked rather than rounded over.
- You can use your rear leg as a guide by sliding your palm down your back thigh until you feel the floor. Then, place your palm firmly on the floor.
- Reverse the motion to bring your torso upright.
- Keep pressing the kettlebell overhead throughout the movement and follow the kettlebell with your gaze.
- Do all reps, then switch sides.
If you’re not ready to hold a weight overhead, practice the move without a weight. It'll still work your core!
Move 2: Tall-Kneeling Forward Press
- Take a tall kneeling position and hold a weight in both hands at chest height.
- Tuck your pelvis slightly under and brace your abdominal muscles.
- Inhale as you press the weight in front of your chest until both arms are fully extended. Hold it there as you exhale slowly and fully.
- Bring the weight back to your chest.
- Do all reps, then switch sides.
To make this exercise easier, perform it from a standing position.
Circuit 4
Do each exercise, then repeat for 2 rounds.
Move 1: Weighted Wood Chop
- Stand with your feet a little wider than shoulder-width apart and hold a weight with both hands.
- Sink into a quarter squat and rotate your torso slightly to bring the weight over to one side of your body.
- Drive up and out of the squat as you pull the weight up and across your body so that it travels in a diagonal line to just past the opposite shoulder.
- Stop the motion by bracing your core muscles. Imagine that you were going to throw the weight but at the last moment, someone yelled “stop!” and you had to immediately stop yourself from throwing the weight.
- Reverse the motion to pull the weight back down across your body to the starting position.
- Do all reps, then switch sides.
Lessen the weight to make the wood chop exercise easier. You can even try holding a light item like a can of soup or book.
Move 2: Plank to Knee Tuck
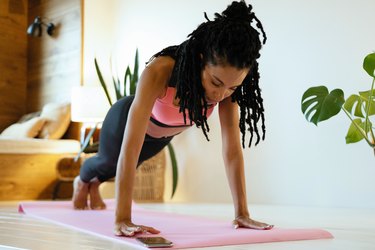
- Start with your feet on the sliders and set up in a high plank with your hands under your shoulders.
- Extend your legs behind you and press your hips and rib cage up. Your body should create a straight line from you head to your toes.
- Use your abdominal muscles to pull your knees into your chest.
- Then, push your knees back out into the plank position, making sure to keep your hips and rib cage pressed up.
- Switch sides. That's 1 rep.
If you don’t have floor sliders, try paper plates or towels on a tiled or wood floor.
Move 3: Suitcase Carry
- Stand with your feet hip-width apart and hold a weight in one hand down by your side, palm facing in. The weight should feel like 7 to 8 out of 10 in terms of intensity.
- Roll you shoulders back and down and brace your abdominal muscles.
- Begin walking, taking controlled steps and looking forward the whole time. Aim to keep your spine tall as you walk.
- Engage your core to prevent your torso from tilting in either direction.
- Do all reps, then switch sides.