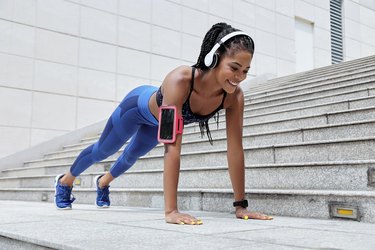
Ever brew a cup of coffee while listening to music and scrolling through social media? These days, it feels like multi-tasking is a must. So, why not apply that concept to your workouts, too?
This at-home stair workout, crafted by April Whitney, certified personal trainer, will sculpt your arms and tone your glutes at the same time — and it's only 20 minutes long, so not a second is wasted.
Video of the Day
Video of the Day
Check out more of our 20-minute workouts here — we’ve got something for everyone.
Circuit 1: Arms
Move 1: Elevated Push-Up
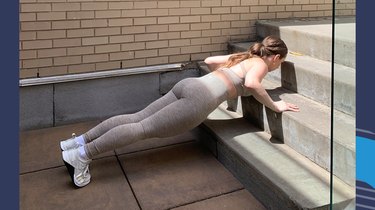
- Start in a high plank with your hands elevated on a step, rooted into the ground shoulder-width apart. Keep your body in a straight line from head to hips to heels.
- Bend your elbows at a 45-degree angle from your ribs and lower your body toward the ground.
- When your chest hovers just above the step, press into your palms and pull your shoulder blades apart to return to a high plank.
- After you finish your reps, take a 20-second rest before moving to the next set.
Tip
You can make this move easier by increasing the elevation and performing the exercise on a higher step. On the flip side, you can make this move more difficult by performing a decline push-up with your feet on the step and your hands on the floor.
Move 2: Tricep Dip

- Start seated on a lower step, facing away from the staircase, legs extended straight along the ground in front of you.
- Place your hands on the edge of the stair at about shoulder-width apart, rooting them into the step.
- Press into your palms and lift your butt off the ground, hovering in front of the step.
- Keeping your weight in your palms, dip your butt toward the ground by bending your elbows back behind you.
- Once your butt taps the floor, press into your palms and lift back up.
- Once 40 seconds are up, rest for 20 seconds before going to the next set.
Move 3: Shoulder Tap
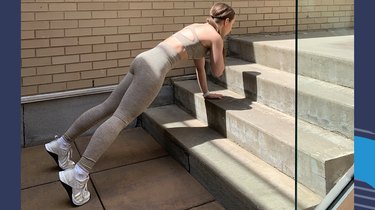
- Start in a high plank with your palms shoulder-width apart on a stair. Brace your core and keep your body in a straight line from head to hips to heels.
- Keeping your hips square and body stable, raise your right palm and tap your left shoulder.
- Pause for a moment, then switch arms, tapping the right shoulder with the left palm.
- Alternate shoulder taps, keeping your toes rooted.
- Rest 20 seconds between sets, and once you finish your last set, rest for 60 seconds before moving to the next circuit.
Circuit 2: Glutes
Move 1: Deficit Reverse Lunge

- Stand on the lowest step, feet hip-width apart and back straight.
- On an exhale, step your right foot back and off the stair onto the ground about two to three feet behind you.
- With shoulders back and chest up, bend the left knee to a 90-degree angle. Simultaneously, lower the right knee until it hovers just above the ground.
- Then, press into the left heel and straighten the left leg, bringing the right leg back to the starting position.
- Repeat this exercise with the left leg rooted for 20 seconds, then switch sides for the next 20 seconds.
- After you complete your reps, take a 20-second breather.
Tip
If deficit lunges feel a little too challenging, you can hold the stair railing for support. Gradually, build your way to the full exercise, easing off the assistance as you get more stable.
Move 2: Elevated Glute Bridge
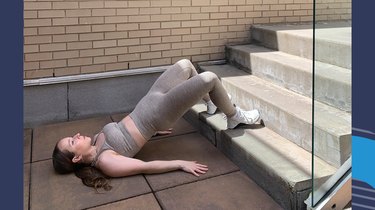
- Start lying on your back a few inches away from the staircase and plant your feet on one of the lower steps.
- On an exhale, squeeze your glutes and lift into a bridge, raising your hips toward the ceiling.
- Pause when you reach the top of the movement.
- Lower back to the ground with control.
- After 40 seconds are up, rest for 20 seconds.
Move 3: Squat Jump With Step Down
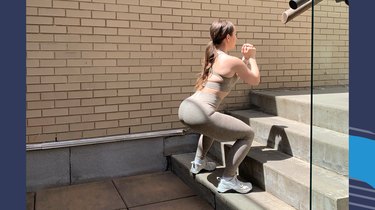
- Start standing about a foot away from the staircase with a slight bend in your knees.
- Swing your arms back behind you.
- Then, using the momentum in your arms as they come forward, jump up onto one of the lower steps.
- Straighten the legs and come to standing.
- Then, step back onto the ground with control.
- Reset to the starting position and repeat.
- Rest for 40 seconds before you rest for 20 seconds, then repeat twice more.
Tip
Progress with this exercise gradually, choosing higher steps as you grow stronger in the movement. Also, make sure you're wearing proper shoes with plenty of cushion and support before giving this move a try.